Translation
Last updated on 2025-07-21 | Edit this page
Estimated time: 30 minutes
Overview
Questions
- Why might a custom JavaScript translation be preferred over third-party translation tools for web content?
Objectives
- Implement a client-side JavaScript translation solution that displays specific content based on user language preferences.
Background
Translation remains an elusive problem on the web. Browsers permit the use of 3rd party tools like Google Translate to translate a web page on the fly. There are also subscription AI tools like Transifex. Translation has come a long way and it now enables users to access content from a variety of languages. But language is complicated by regionalisms, varieties, and problems between literal and figurative speech. At times, translation services miss these subtleties. JavaScript enables us a straightforward way to customize our translation for users and be sure that we have full control over the content that a user sees.
In this episode we will focus on setting up our language translation buttons in the top right corner of our page:
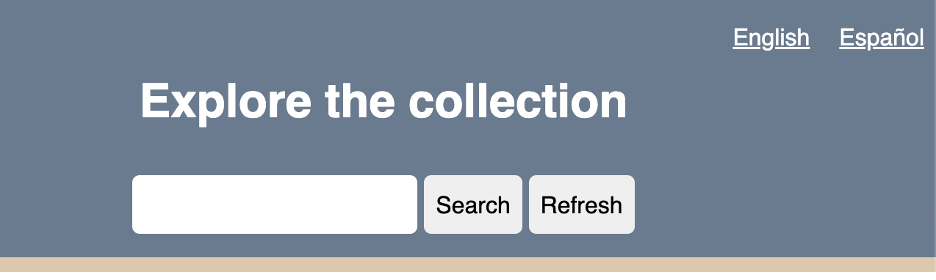
User Interface
First, we’ll create a new file called translation.js in
which we’ll create our translation app. Your file structure should look
like this:
–webapp
	–app.js
	–index.html
	–style.css
	–translation.js
Next, we need to link this new JavaScript file with our webpage. Open
up index.html and add a link using a
<script> tag at the bottom of the file:
INDEX.HTML
[...]
<main>
       <div id="display"></div>
   </main>
<script src="translation.js"></script>
<script src="app.js"></script>
</body>
</html>
Within our index.html file, we should also examine the
structure of the language selector:
INDEX.HTML
[...]
<div class="translation">
      <a href="" data-lang="en">English</a>
      <a href="" data-lang="es">Español</a>
</div>
We see that these are actually anchor elements
<a>. We have left the href empty because these links
will not direct users to a new page. Instead, these links will trigger
our translation.js script. Also, we custom
data-lang elements. Notice that each link has a
two-character language code: en for English and es for
Spanish. We’ll use these to cue our translation.js script
to translate the page to the user’s language preference.
Next, lets take a look at the HTML elements we want to translate:
INDEX.HTML
[...]
<h1 id="welcome-msg">Explore the Collection</h1>
   <div class="search-bar">
       <input id="input" autocomplete="off" type="text" aria-label="Enter keywords to search">
       <button id="search-btn" aria-label="Run search button">Search</button>
       <button id="refresh-btn" title="Refresh" aria-label="Refresh search results button">Refresh</button>
   </div>
We have our welcome message in the <h1>, search
button, and refresh button. All of these elements have an id element
that will let us target and translate them in
translation.js.
Storing our Translations
Now let’s switch over to translation.js. We will first
target all three of these elements:
TRANSLATION.JS
const welcomeMsg = document.getElementById('welcome-msg');
const searchButton = document.getElementById('search-btn');
const refreshButton = document.getElementById('refresh-btn');
Translation using JavaScript works by creating a 1:1 translation
table. When our script receives the language code, en or
es, it then looks up what text to display for the welcome
message, search button, and refresh button elements we just targeted
above. We’ll create an object called translations that
includes a set of content for English (en) and Spanish (es).
TRANSLATION.JS
const translations = {
   en: {
       welcomeMsg: 'Explore the collection',
       searchBtn: 'Search',
       refreshBtn: 'Refresh',
   },
   es: {
       welcomeMsg: 'Explorar la colección',
       searchBtn: 'Buscar',
       refreshBtn: 'Recargar',
   }
};
As you can see, we reference the element we want to target, for
example welcomeMSG. And then under each language, we put
the content we want to display.
translatePage() Function
Now we can create a function to execute our translation:
TRANSLATION.JS
let currentLanguage = 'en'; // Default language

function translatePage(language) {
   currentLanguage = language;

   // Update text content for the specified language
   welcomeMsg.textContent = translations[language].welcomeMsg;
   searchButton.textContent = translations[language].searchBtn;
   refreshButton.textContent = translations[language].refreshBtn;
}

// Initial translation based on the default language
translatePage(currentLanguage);
We start by setting our default language to English (en). Then we
create the function translatePage(), which takes as an
argument the two-character language code. For each element on our page,
JavaScript manipulates the textContent in the HTML by looking up our
specified translations. The script then injects the translated content
into our HTML.
Finally, we need to create an event listener that will pass the
two-character language code to our translatePage() function
when a user clicks on their preferred language:
TRANSLATION.JS
// Handle language selection from translation language links
document.querySelector('.translation').addEventListener('click', function (event) {
   const selectedLanguage = event.target.getAttribute('data-lang');
   if (selectedLanguage) {
       event.preventDefault(); // Prevent default page reload
       translatePage(selectedLanguage);
   }
});
When a user clicks on a language link, the script retrieves the
two-character code listed by the data-lang custom element.
event.preventDefault() will prevent the
<a> tag from carrying out its normal link action and
refreshing the page. If it refreshes the page, it will cause us to have
to reload the API data, which will make our site a much slower
experience for users. Finally, we pass the two-character language code
to translatePage() function.
Episode Summary
In this episode, we implemented a custom, client-side translation system by creating and linking a translation.js file. We did this by utilizing “data-lang” attributes and event listeners to capture a user’s language preference (“en” & “es”). Once a user makes a selection, our site’s content is dynamically translated with our predefined translation, giving us a free–and far more reliable–option than subscription or AI-based solutions.