This documentation is to go over how to use the Carpentries Workbench Converter. This is a more specific case made for the UCLA Data Science Center so the information is not very generalized.
Setup
It is recommended to use RStudio for this process. You can download it in the link provided. Start a new project in RStudio and preferrably in an empty folder. Once you have this new session you can clone the lesson transition tool using this command in the terminal.
git clone https://github.com/carpentries/lesson-transition.git && cd lesson-transition
This will clone the repository as well as change your bash directory to the lesson-transition directory. You will then want to navigate to that directory and set it as your working directory.

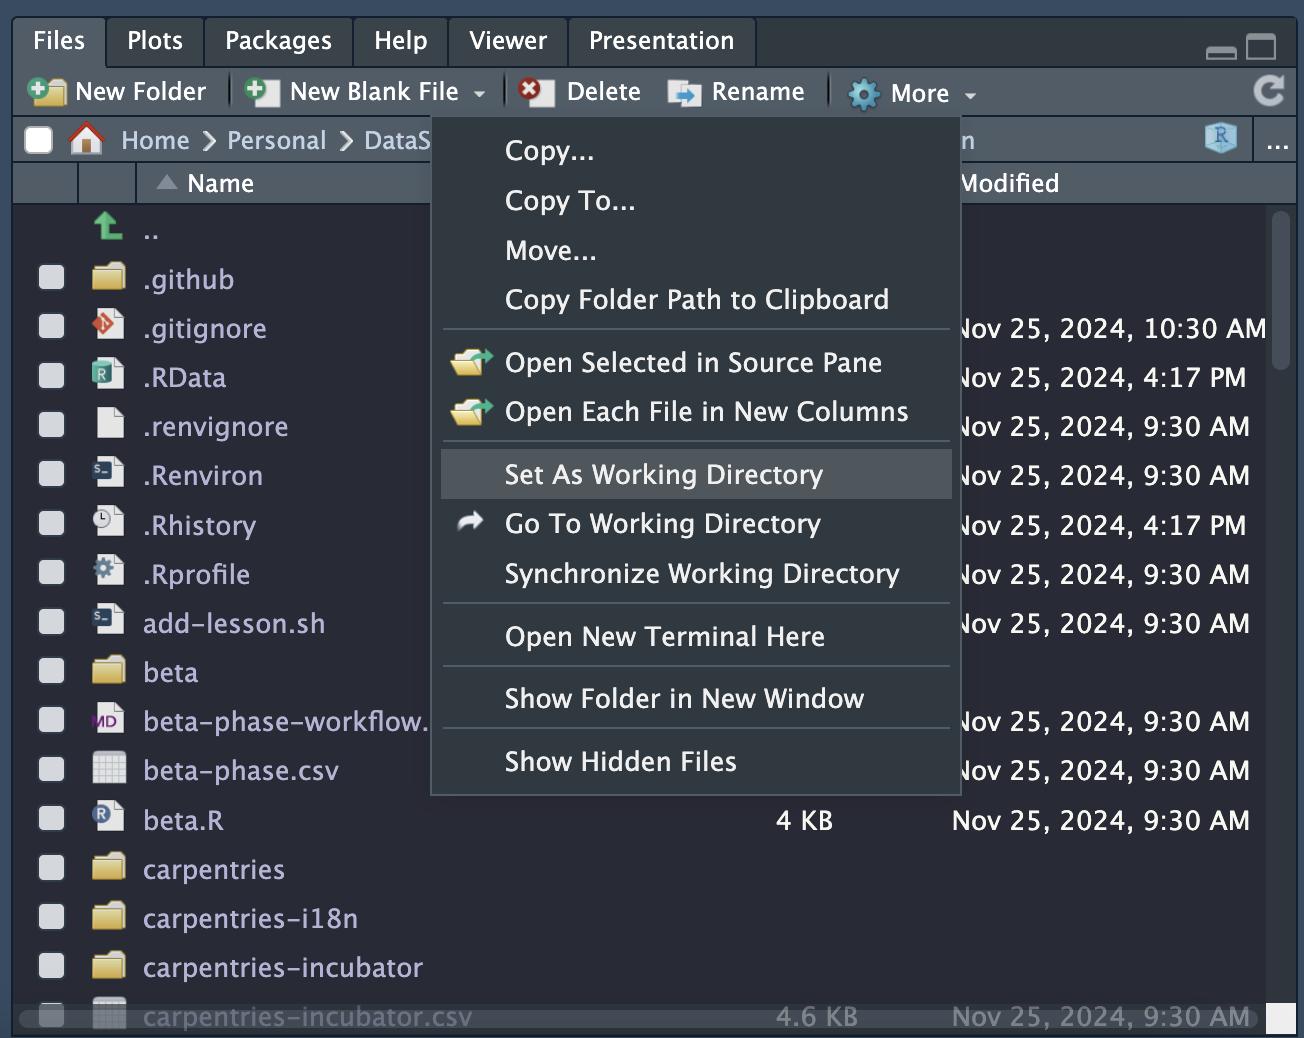
Once you have set the working directory to the lesson transition tool you can start by setting up your R environment. You will now be switching over the Console tab and run the following commands.
install.packages('renv') # enter 'y' to complete the installation
library('renv')
renv::restore()
If you run into any package dependencies, you can try the following:
-
renv::update() - If that doesn’t work then you can open the renv.lock file inside the directory and change the depracated versions to the working versions. For example if
sandpaperisn’t working you canctrl + fand look upsandpaperand change it to the correct version. Note: As of writing this the latest version of sandpaper is 0.16.10.
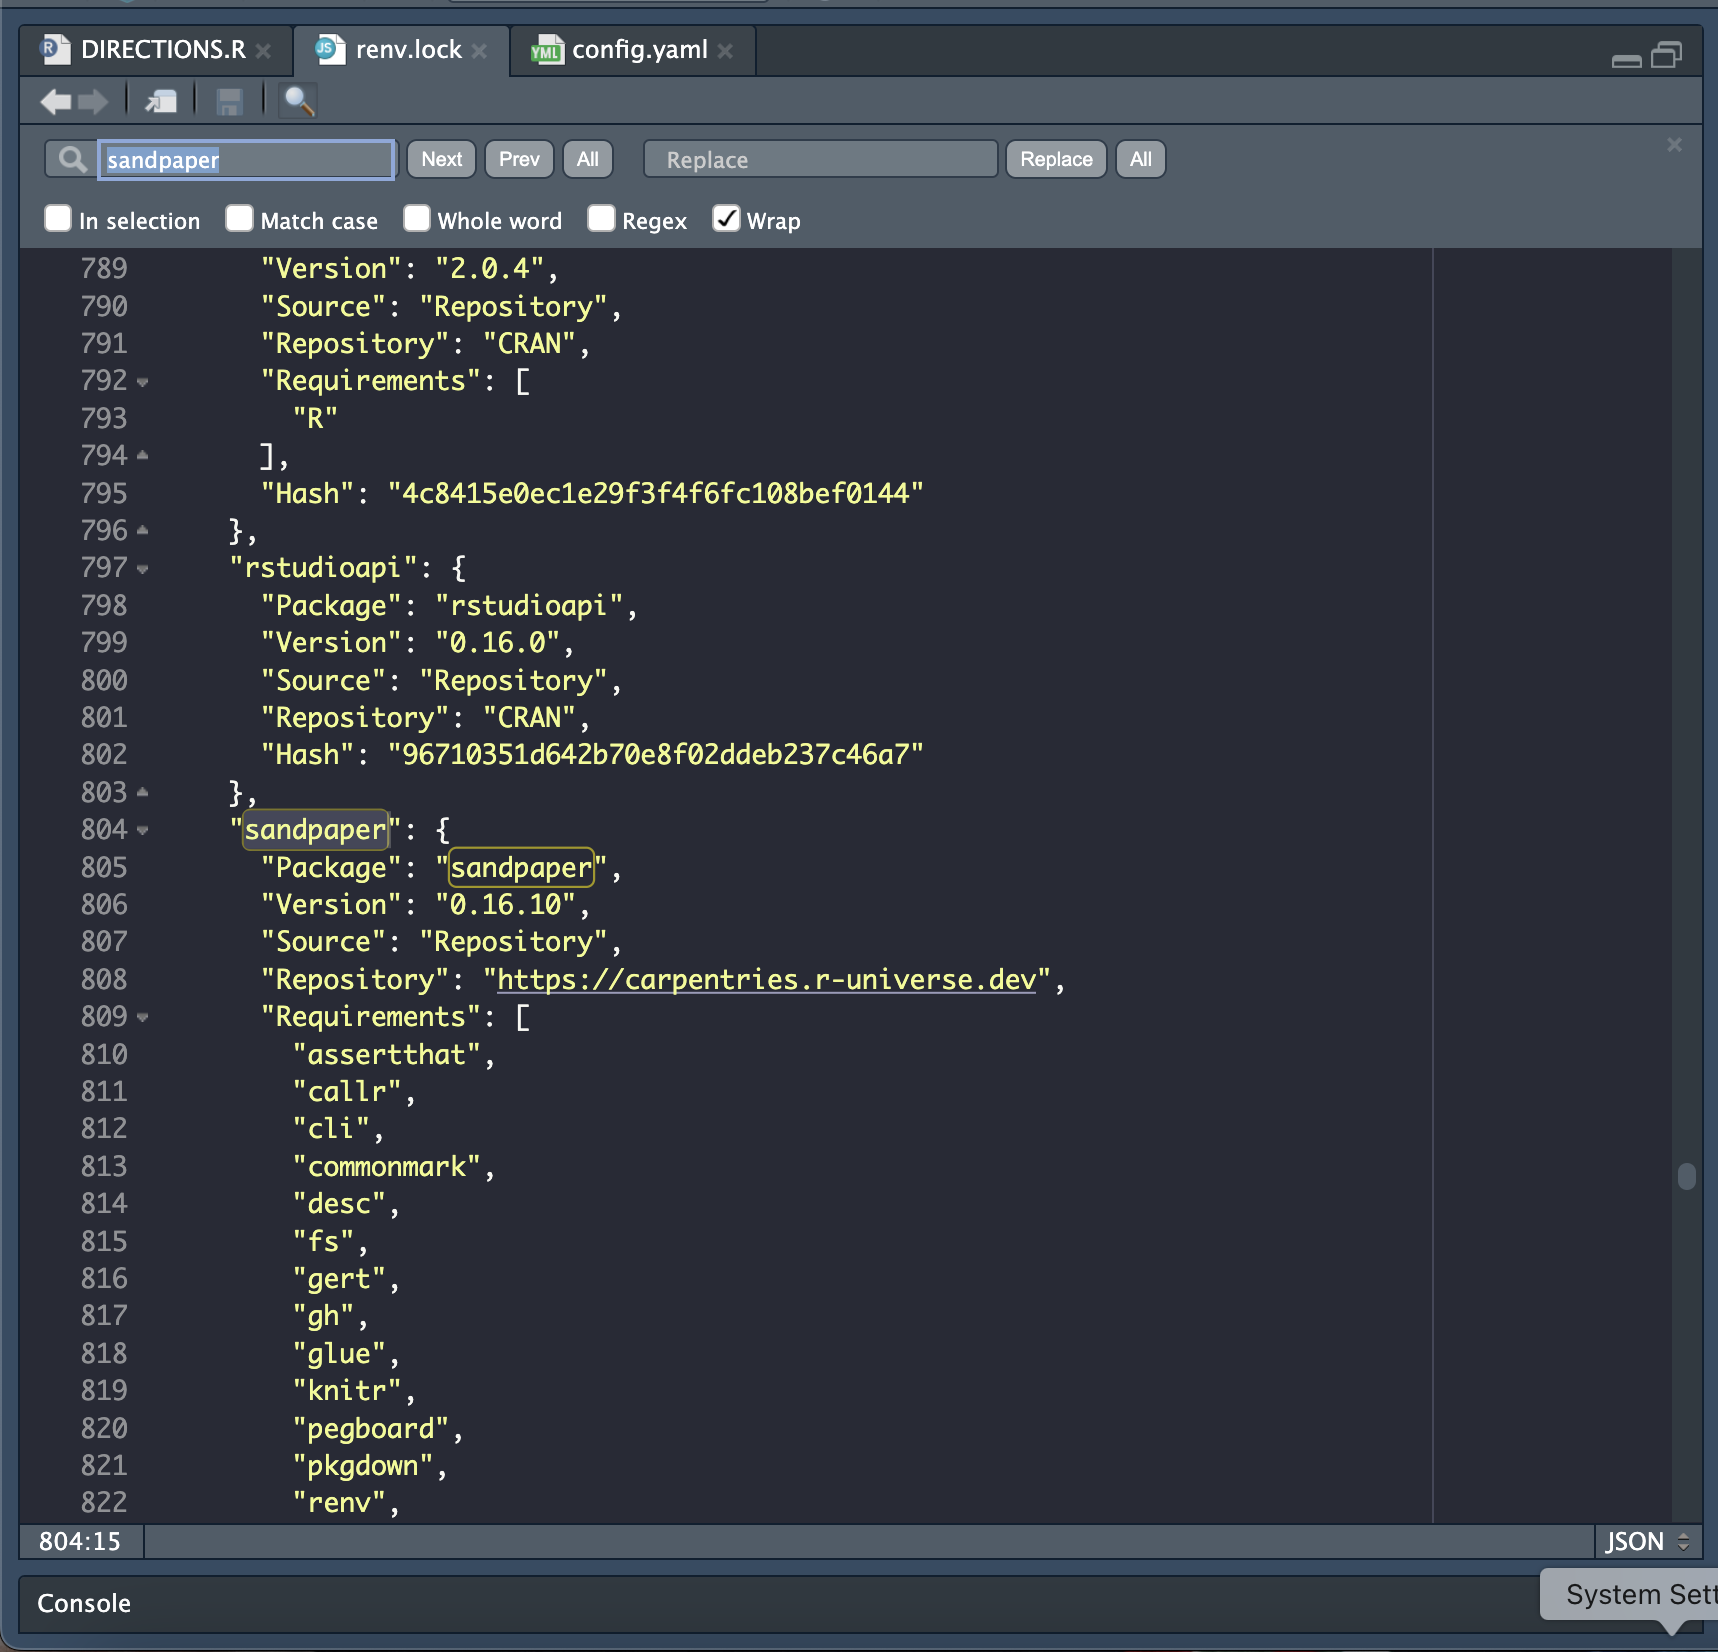
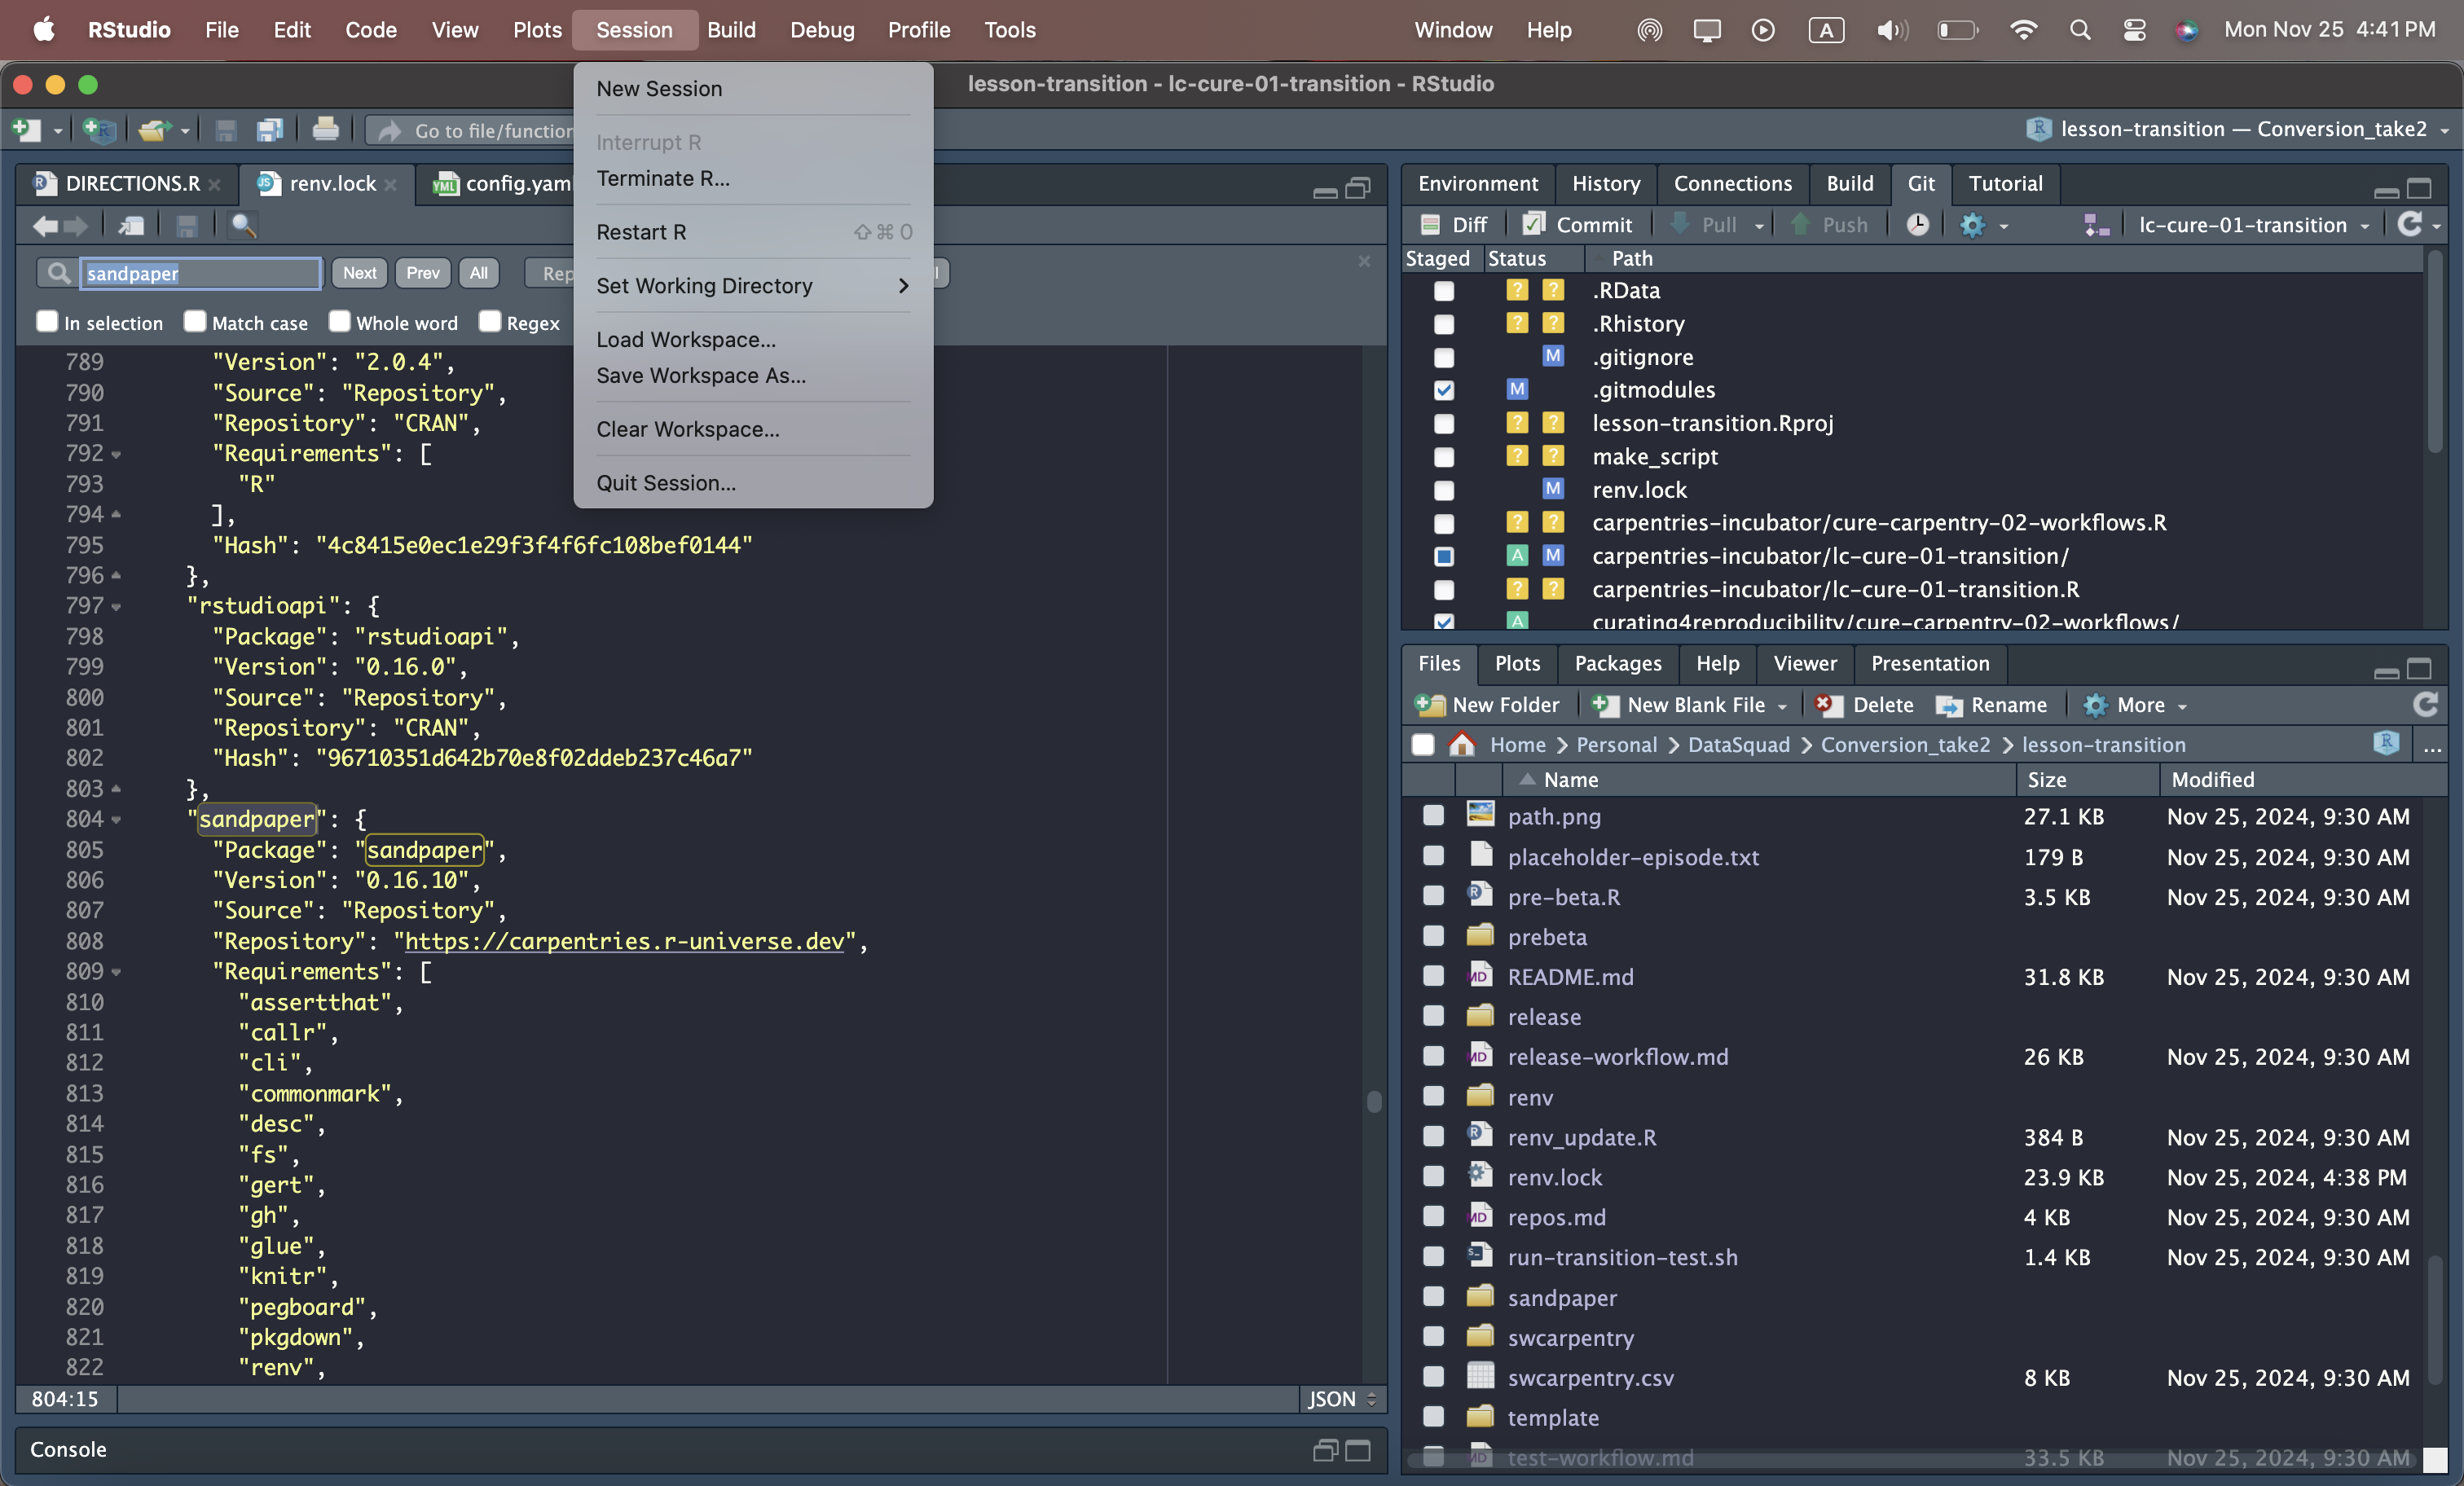
Once you update the package dependencies rerun renv::restore() to download the required packages. Once it downloads the required packages you will want to restart your R session. You can do this from the session option tab at the top and restart session.
Preparing your Lesson
Now that the environment is properly setup we will now transition to creating our templates to convert our lessons. First you want to run the following command to populate a template folder with a sample lesson that will be called in further functions. Run this function in the terminal.
Rscript establish-template.R template/
Afterwards you want to clone the LESSON that you want to transition into the lesson-transition directory. The following command will provide you a template to clone your lesson, however, it is VERY IMPORTANT to change YOUR-LESSON-NAME to the name of the lesson you are converting as well as carpentries-incubator to the repository that HOSTS your lesson. I will provide an example after giving the command. Run the following command in your terminal.
git submodule add --force -b gh-pages https://github.com/carpentries-incubator/YOUR-LESSON-NAME carpentries-incubator/YOUR-LESSON-NAME
IMPORTANT READ AND FOLLOW THIS EXAMPLE
In this example I will be converting this cure-carpentry lesson. This is the link to the github page: https://github.com/curating4reproducibility/cure-carpentry-01-intro/tree/gh-pages. The command I will be running is
git submodule add --force -b gh-pages https://github.com/curating4reproducibility/cure-carpentry-01-intro curating4reproducibility/cure-carpentry-01-intro
Note how I changed the carpentries-incubator to curating4reproducibility, this is because the lesson is originally hosting at the curating4reproducibility github page. Also note how I changed YOUR-LESSON-NAME to the same name as the lesson in the original github.
Now that you have cloned the lesson you want to create an Rscript for the lesson. You can do so with the following command in the lesson-transition directory through your terminal
bash add-lesson.sh carpentries-incubator/YOUR-LESSON-NAME
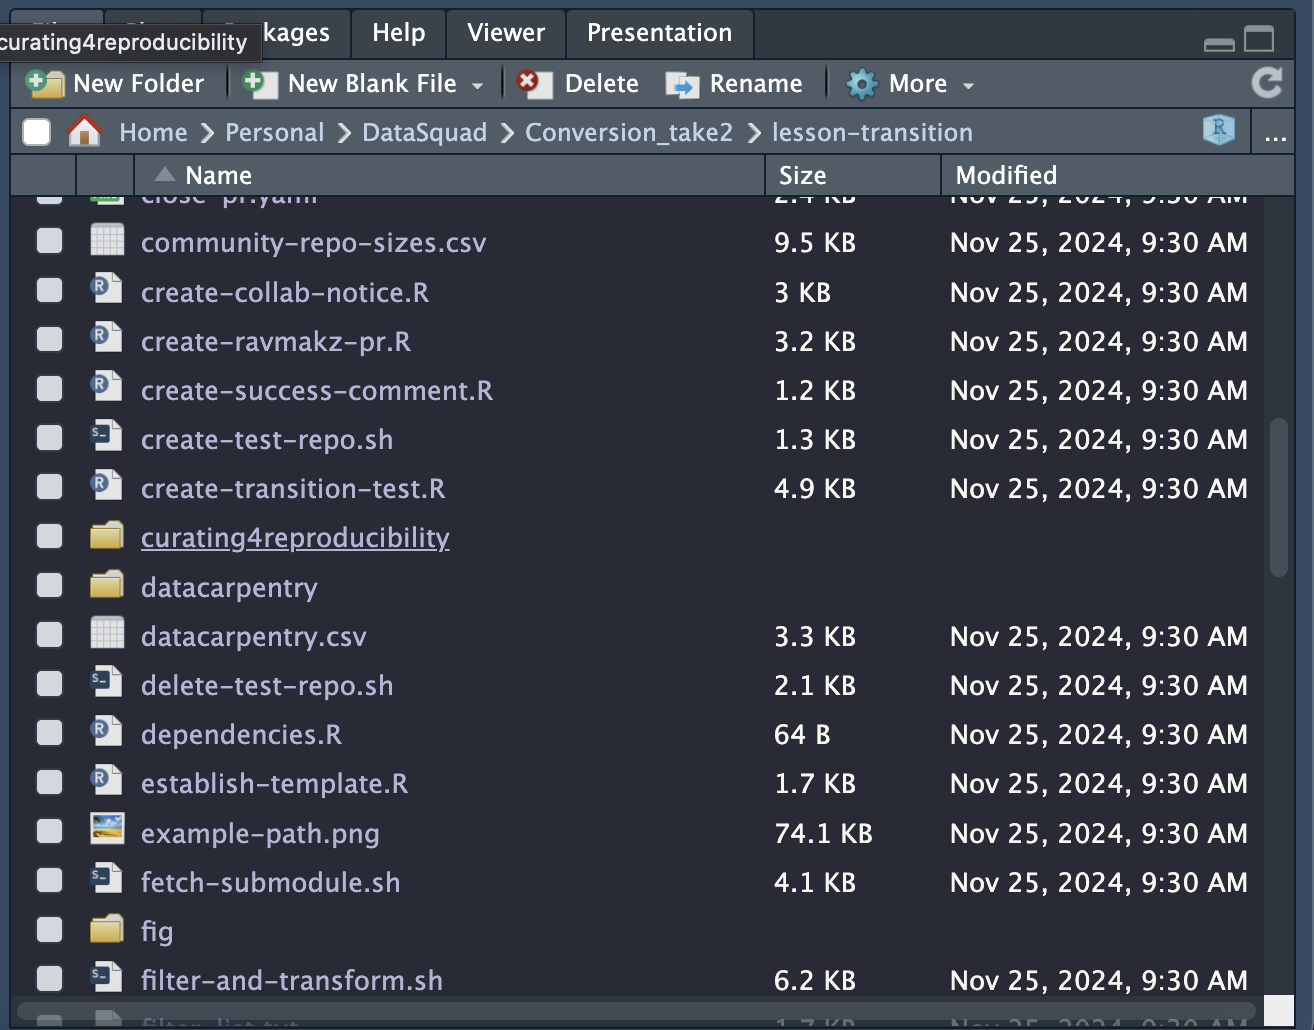
In the example I would do bash add-lesson.sh curating4reproducibility/cure-carpentry-01-intro. These commands should do populate your lesson-transition with a folder curating4reproductibility and curating4reproducibility/cure-carpentry-01-intro
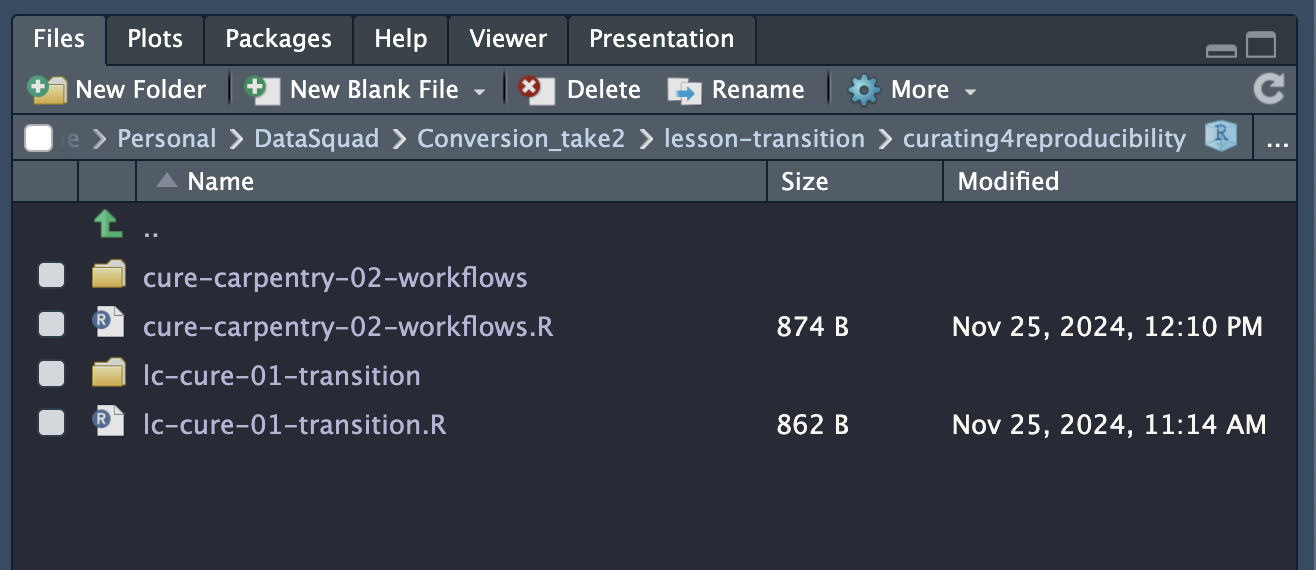
Transitioning your lesson
Open a new terminal session and navigate to the folder holding the repository of the original lesson. In the example it would be lesson-transition/curating4reproducibility/cure-carpentry-01-intro. Then delete the main branch with the following command.
git branch -D main
After deleting the main branch you will then run the command in the lesson-transition directory (aka the root directory).
make release/carpentries-incubator/YOUR-LESSON-NAME.json
# make release/curating4reproducibility/cure-carpentry-01-intro.json
For UCLA DSC Students and Staff
Create a new repository in the DSC organization. 
Once you have created a new repo. In a separate folder, clone the original lesson that you want to convert with the following process:
git clone -b gh-pages https://www.github.com/link-to-lesson
Once you have cloned it go into that directory then do a git status. If everything is up to date then you want to change the remote url to the new repo that you had created in the DSC organization. You can change the remote repo with the following
git remote set-url origin git@github.com:ucla-data-science-center/lc-cure-01.git
# Replace the url with your ssh url
It is important to use the ssh url as the DSC organization requires a further layer of authentication. Then you will do a git push to push to the new repo. Once you have the contents in the DSC repo you want to rename the gh-pages branch to legacy/gh-pages in order to preserve the commit history.
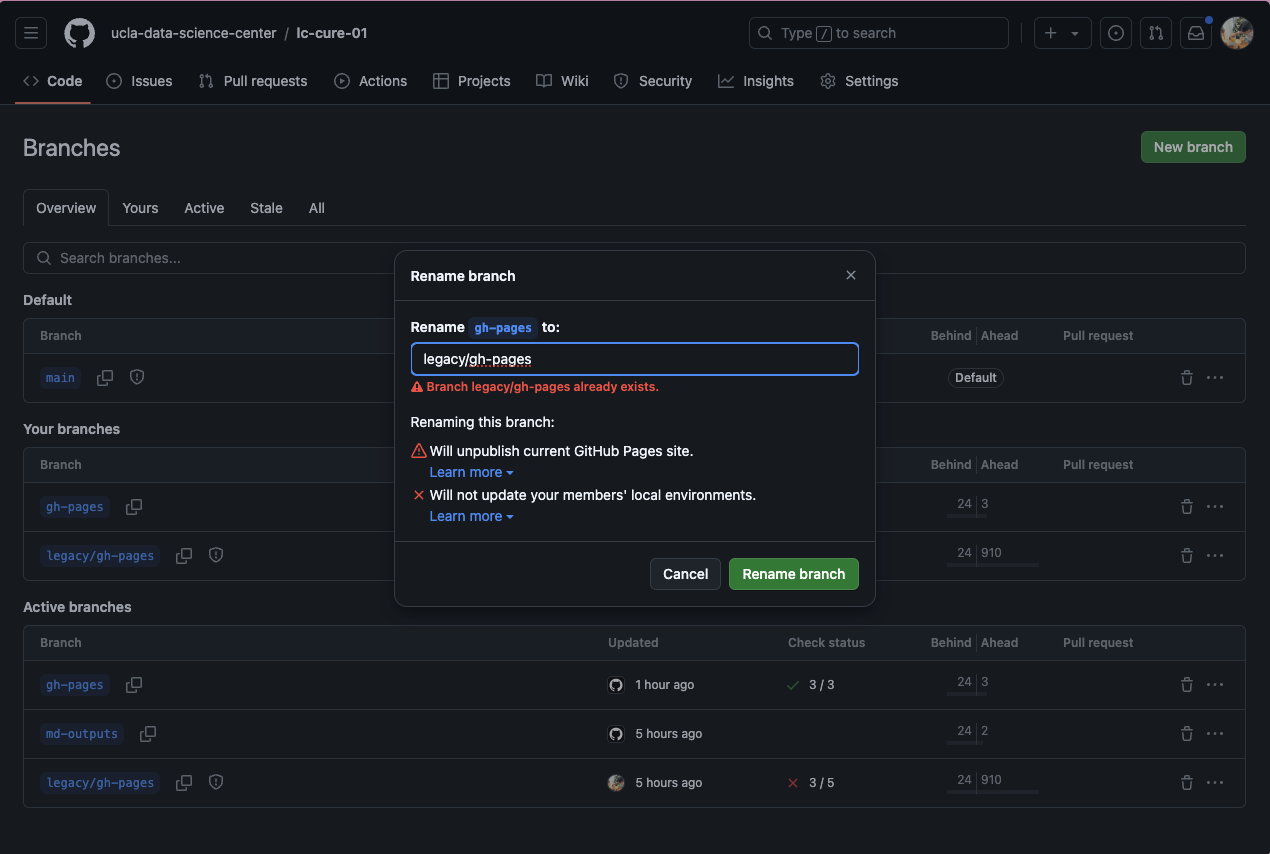
Updating the config.yaml file
Now that you have that done, go back to RStudio. Navigate to release/nameOfOrganization/Lesson-Name-workflows and click on the config.yaml.
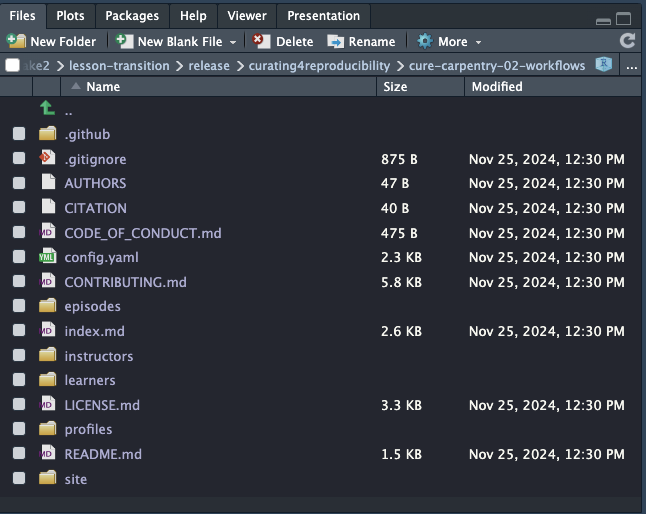
Change and add any information that you think is required. To find the original date you can use the following command git log | tail this will give you the earliest commit date.
Once you are done with the config.yaml you can now commit your changes. Make sure that your terminal directory is in the right place
git add config.yaml
git commit -m 'complete configuration of Workbench lesson site'
You will want to run the following suite of commands. Make sure that the remote is pointing to the right place.
git remote -v # check the names and addresses of your remote repositories: if you are testing on a fork and it is not listed here, add it with 'git remote add' https://git-scm.com/docs/git-remote#Documentation/git-remote.txt-emaddem
git fetch --prune origin # this assumes your remote is called origin - if you are testing on a fork, use the name of that remote here instead
git checkout --orphan gh-pages # set up gh-pages branch
# double-check that you are in the root of your lesson within the lesson-transition/release folder (e.g. if transitioning carpentries-incubator/docker-introduction, you should be in lesson-transition/release/carpentries-incubator/docker-introduction/)
git rm -rf .
mkdir -p .github/workflows/
curl -o .github/workflows/close-pr.yaml https://raw.githubusercontent.com/carpentries/lesson-transition/main/close-pr.yaml # download the workflow that will auto-close invalid PRs to gh-pages
git add .github/workflows/close-pr.yaml
git commit --allow-empty -m 'Initialising gh-pages branch'
git push --force origin HEAD:gh-pages
Once you do this you have pushed the gh-pages branch onto your repo and now you want to push the main branch. You can do so with the following:
git switch main
git push --force --set-upstream origin main
Now you are done with RStudio and will move to the github page.
Github Repository Settings
In the settings you want to do the following:
-
Change the default branch to main. This is in the general section
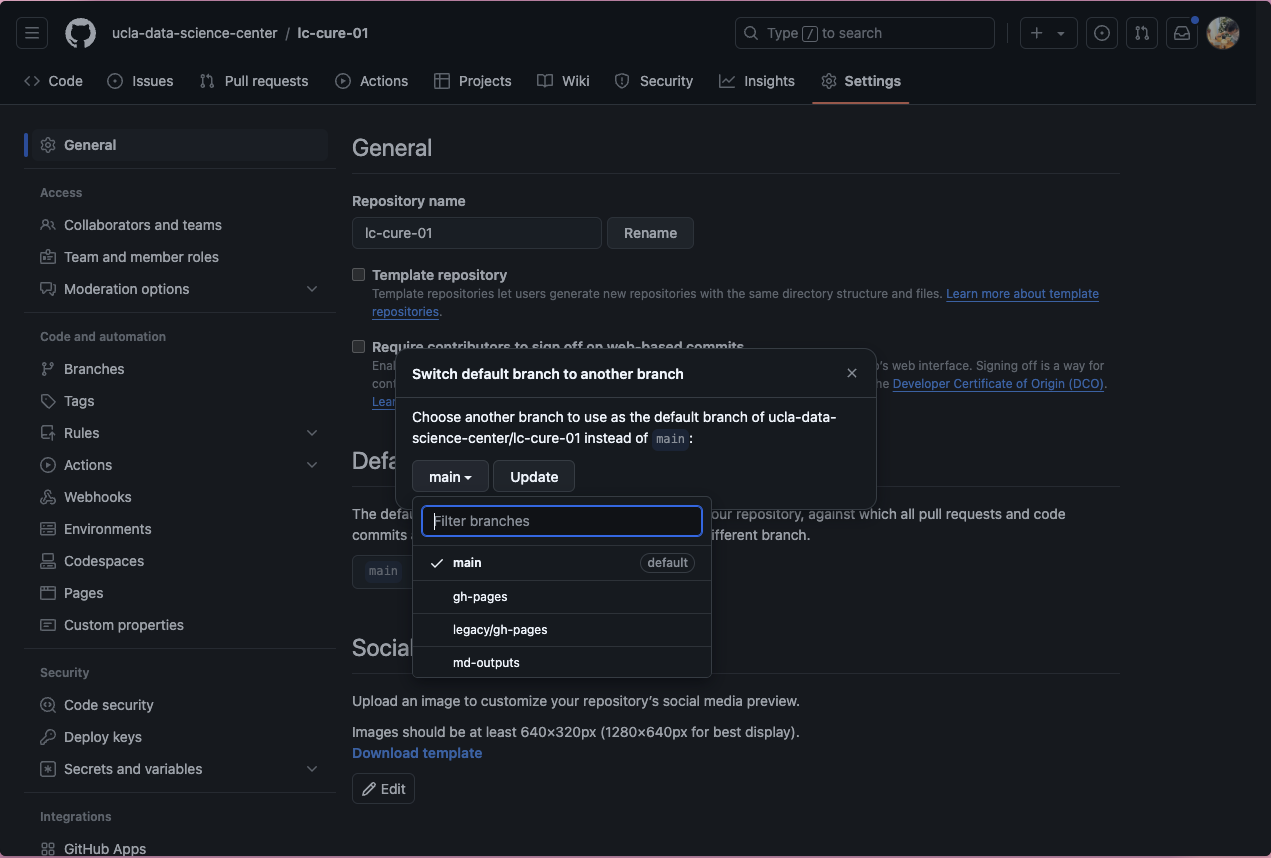
-
Change the page deployment to
gh-pages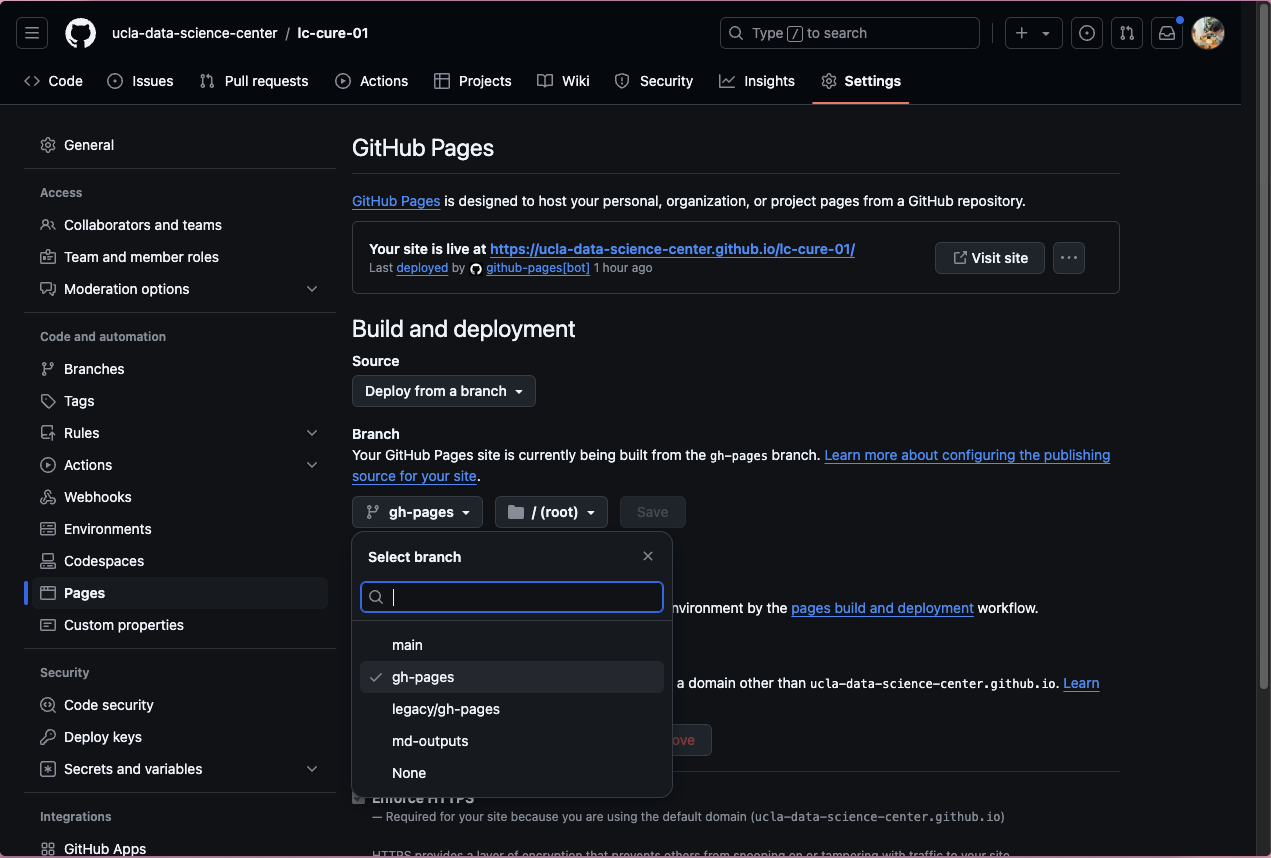
-
Add Branch Protection rules. Lock the
legacy/gh-pagesbranch by clicking on rulesets.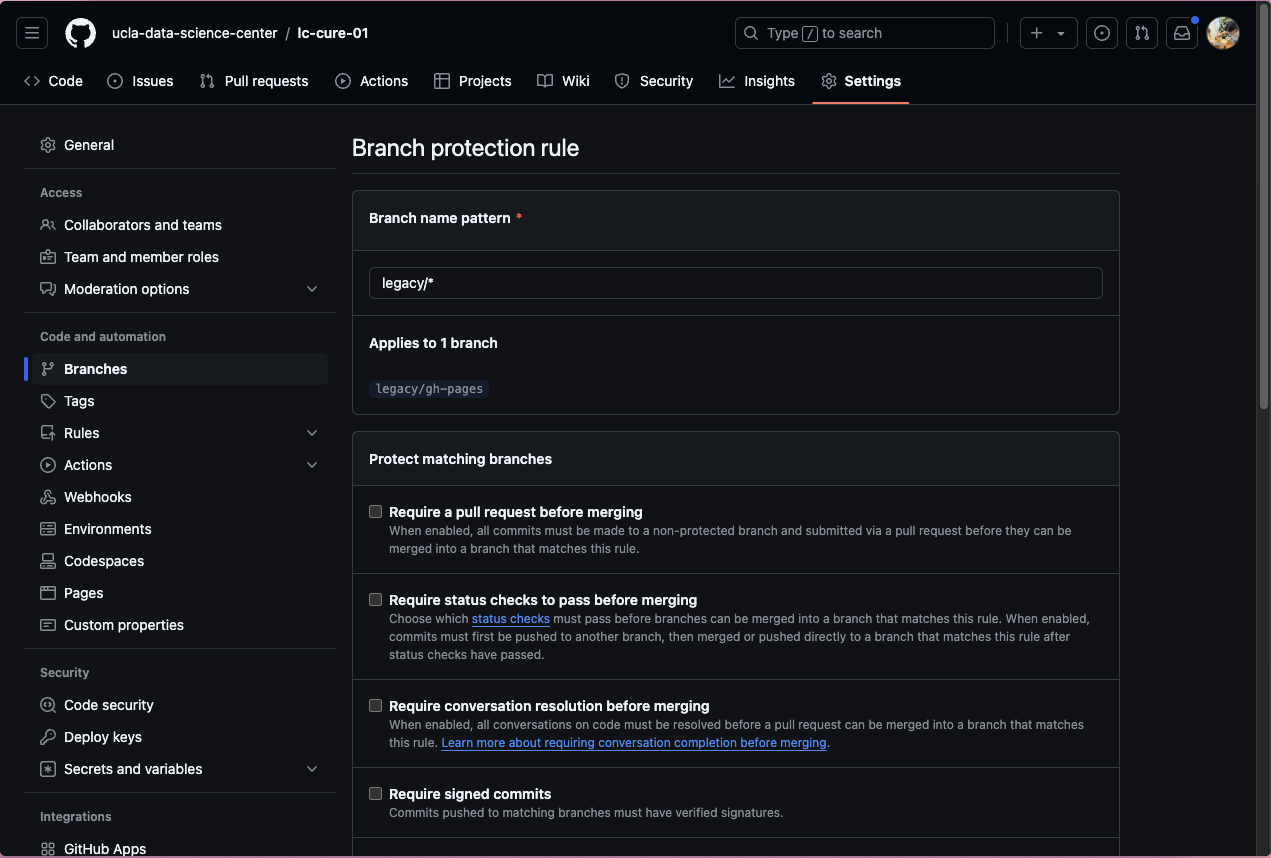
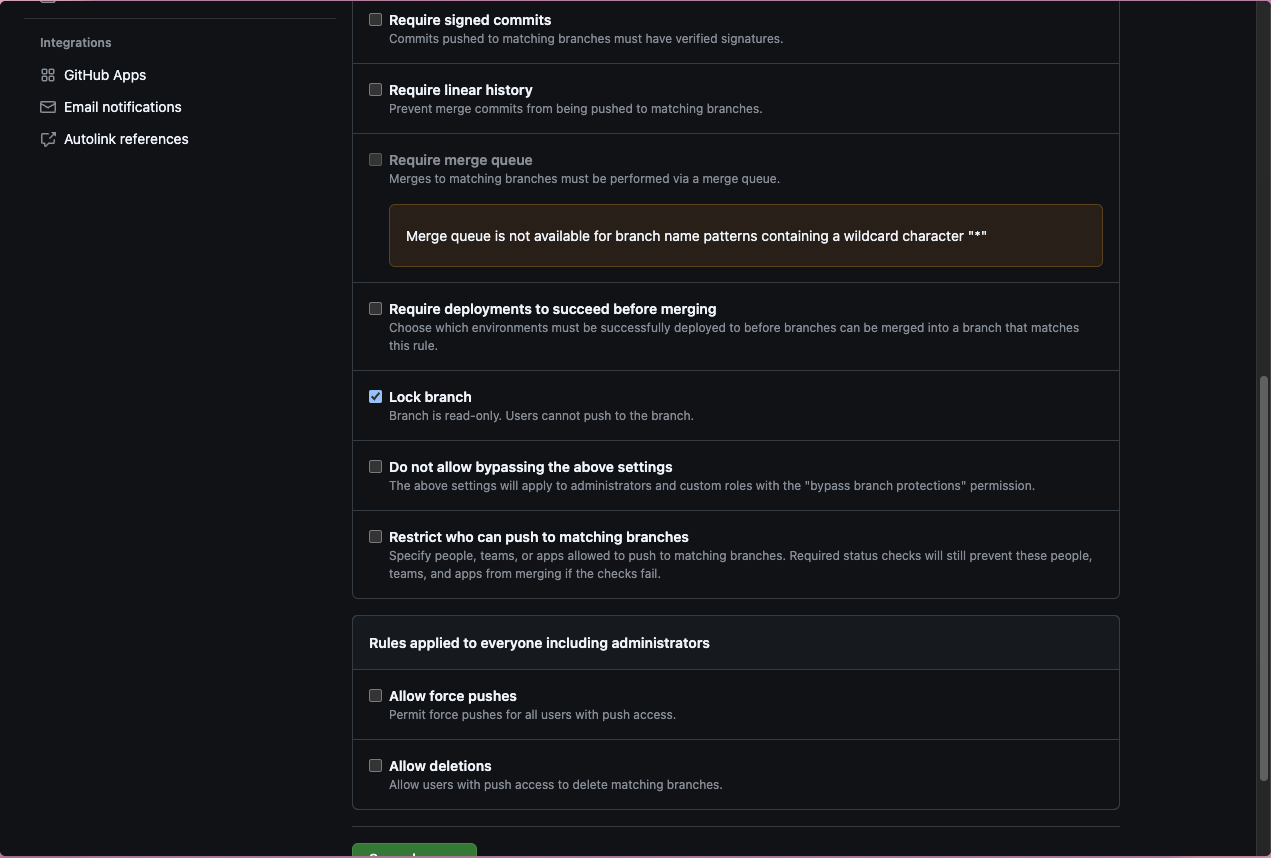
-
Add Branch Protection rules. Make the main require a PR before any changes.
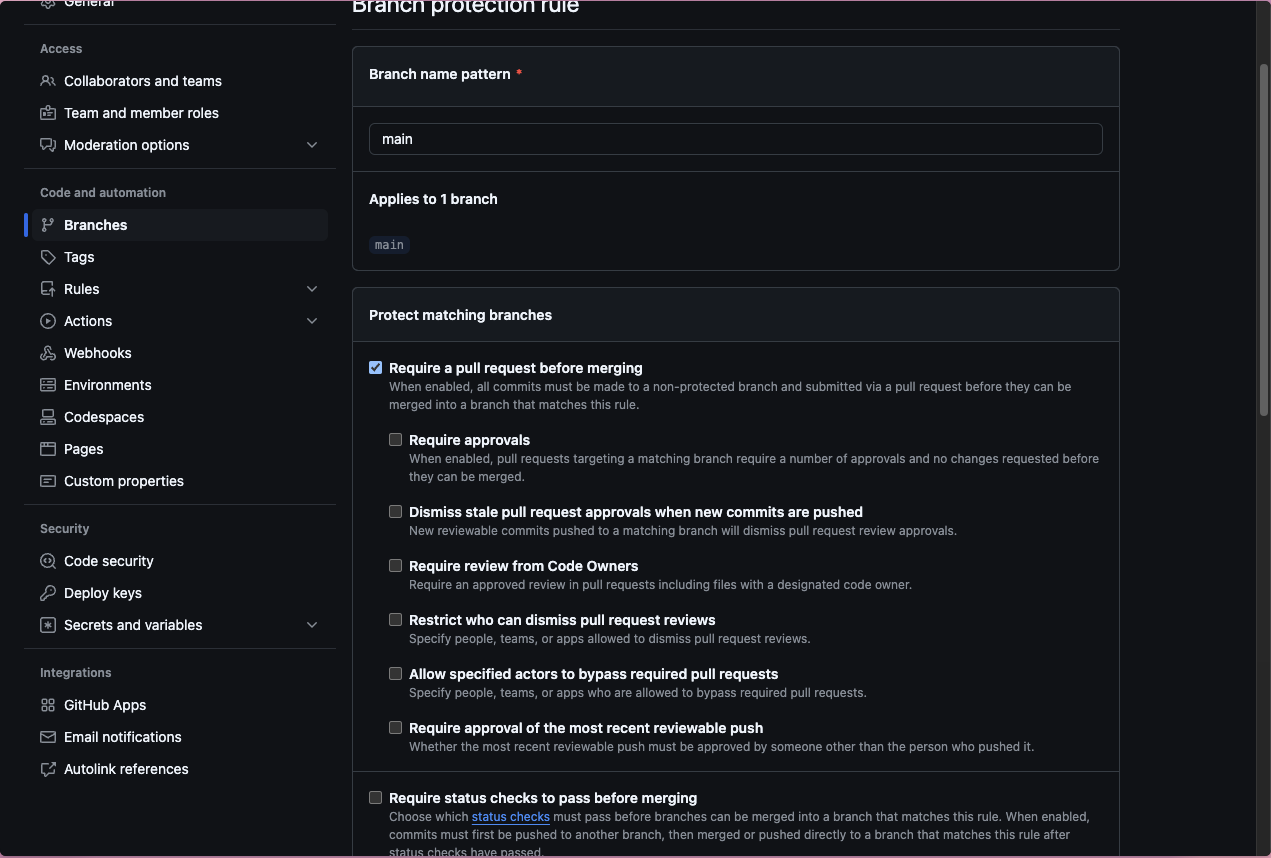
Github Workflow setup
The last part is to setup the Github Actions correctly to update dependencies. You can do so by going to the actions tab. Click on the 02 Maintain: Update Workflow Files action then click Run workflow and follow the steps for the token. 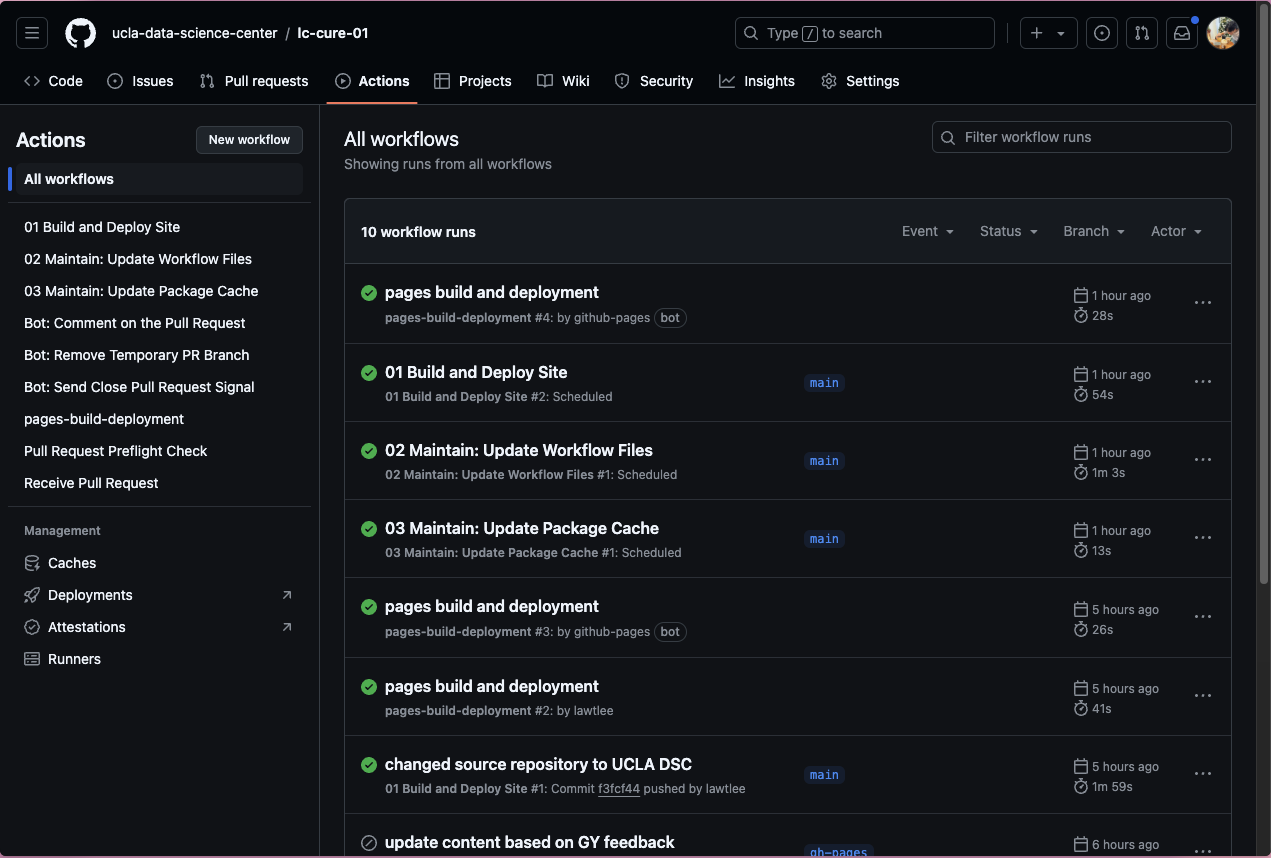

You have now successfully converted your lesson.